Shell commands for different system info (battery time/percent/temp; CPU percent; disk percent/free/used; memory free/available/used/etc; bluetooth 'is connected'; network download/upload throughput.)

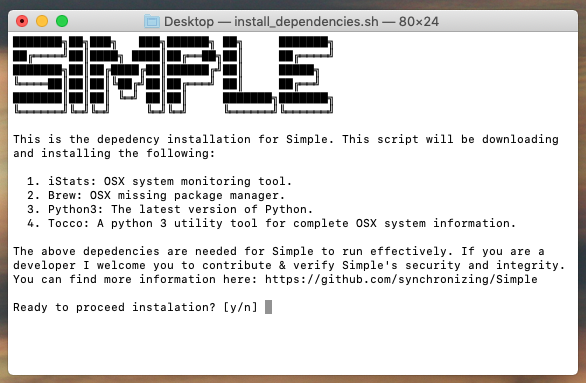
A few weeks ago I posted in the forums Tocco, which is a Python utility that is able to grab a good amount of OSX system info. In hopes of speeding things up, I began researching OSX commands that give partial system info and wrote a few bash scripts that some folks in here might find useful.

Do note that the multiline commands can be simply put into one line -- my intention wasn't to make things look obscure. I do not believe there is a feasible way to grab the following out-of-the-box from OSX (but would love to be proven wrong):

  • CPU Temperature
  • Battery Temperature

Note: All of these commands are native to OSX. None of these commands require sudo. Contributions to this thread are welcomed. :slight_smile:


Battery

Percent Left

pmset -g batt | grep "InternalBattery" | awk '{print $3+0"%"}'

Time Left

pmset -g batt | grep "InternalBattery" | awk '{print $5}'

Temperature

Fahrenheit

bc <<< "scale=2; ((($(ioreg -r -n AppleSmartBattery | grep Temperature | awk '{print $3}')/10.0)-273.30) * 9/5) + 32"

Celsius

bc <<< "scale=2; (($(ioreg -r -n AppleSmartBattery | grep Temperature | awk '{print $3}')/10.0)-273.15)"

CPU

Percentage Being Used

/usr/bin/top -ocpu -R -F -l 1 | grep "CPU usage" | awk '{print $3+$5"%"}'

Disk

Percentage Free

df | grep disk1s1 | awk '{print 100-$5"%"}'

Free Disk

df -h | grep disk1s1 | awk '{print $4"B"}'

Used Disk

df -h | grep disk1s1 | awk '{print $2"B"}'

Memory

Replace free in the grep -w "free" statement to pull a different values. Available values:

  • free
  • inactive
  • active
  • speculative
  • Others in vm_stat command.

Specific

function bth () {
    b=${1:-0}; d=''; s=0; S=(B {K,M,G,T,P,E,Z,Y}B)
    while ((b > 1024)); do
        d="$(printf ".%02d" $((b % 1024 * 100 / 1024)))"
        b=$((b / 1024))
        let s++
    done
    echo "$b$d ${S[$s]}"
};
bth $(vm_stat | grep -w "free" | awk '{print $3*4096}')

Bluetooth

Is Device Connected

Change the device_name to whatever Bluetooth device you have on your computer. Prints either "Yes" or "No."

export device_name="AirPods"
echo $(system_profiler SPBluetoothDataType 2> /dev/null | grep $(echo $device_name) -A 7 | grep Connected) | awk '{if($1==""){print "No"}else{print $2}}'

Network

SSID Name

/System/Library/PrivateFrameworks/Apple80211.framework/Versions/Current/Resources/airport -I | grep -w SSID | awk '{print $2}'

Network Download Throughput

function bth () {
    b=${1:-0}; d=''; s=0; S=(B {K,M,G,T,P,E,Z,Y}iB)
    while ((b > 1024)); do
        d="$(printf ".%02d" $((b % 1024 * 100 / 1024)))"
        b=$((b / 1024))
        let s++
    done
    echo "$b$d ${S[$s]}/sec"
};

function func () {
  nettop -L 1 -c -P -x | awK -F "\"*,\"*" '{sum += $5} END {print sum}';
};

export first=$(func);
sleep 1;
export second=$(func);

bth $(expr $second - $first)

Network Upload Throughput

function bth () {
    b=${1:-0}; d=''; s=0; S=(B {K,M,G,T,P,E,Z,Y}iB)
    while ((b > 1024)); do
        d="$(printf ".%02d" $((b % 1024 * 100 / 1024)))"
        b=$((b / 1024))
        let s++
    done
    echo "$b$d ${S[$s]}/sec"
};

function func () {
  nettop -L 1 -c -P -x | awK -F "\"*,\"*" '{sum += $6} END {print sum}';
};

export first=$(func);
sleep 1;
export second=$(func);

bth $(expr $second - $first)

Here's how you show how much disk space you have used / free on your boot drive:

df -H / | awk '/\//{getline; print $3" / "$4}'

Mine shows this:

155G / 286G

If you just want free space:

df -H / | awk '/\//{getline; print $4}'

or just used space

df -H / | awk '/\//{getline; print $3}'

1 Like

Completely forgot disk space -- good idea! Gonna modify those a little bit and post em' in a sec. Thanks for the share.

get SSID of current Wi-Fi network

This option works regardless of what port your Wi-Fi is on:

/System/Library/PrivateFrameworks/Apple80211.framework/Versions/Current/Resources/airport -I \
2>/dev/null | awk -F': ' '/ SSID/{print $NF}')

This one works if you know which port is your Wi-Fi port (usually en0 on MacBooks, en1 on iMac or Mac mini):

networksetup -getairportnetwork "en0" 2>/dev/null \
| sed 's#^Current Wi-Fi Network: ##g'

Or you can calculate the proper port and then use it:

PORT=$(networksetup -listallhardwareports 2>/dev/null \
| grep 'Wi-Fi' -A1 \
| grep -o en.)

networksetup -getairportnetwork "$PORT" 2>/dev/null \
| sed 's#^Current Wi-Fi Network: ##g'
1 Like

Modified it a little bit and added! Thanks for share again.

How would I modify upload and download throughput to show Mbps instead?

Is there anything for CPU and Grpahics Temps @synchronizing?

Any idea how to have network speed be displayed in one single unit? This seems to alternate between b/kb/etc.

Might be able to use this for CPU Temp, Requires iStats installed.

Get fan CPU(Temp) and clean up output - Install in Terminal: "sudo gem install iStats"

set temp to do shell script "/usr/local/bin/istats cpu --value-only | awk '{print int($1+0.5)}'"
set value to do shell script "sed s/[a-zA-Z:{},]//g <<< " & temp
set value to value & "Β°C"
return value

Do you think I can set a BTT action to run gem install automatically without issues?

I personally couldn't find a bash command for either. I do know that iStats does provide this, but of course it needs to be installed first.

You would have to change the bth function on either/both upload and download the bash command. The output of nettop is simply bytes_out or bytes_in, and so one would have to make the proper conversion of bytes to their designated unit.

To be more clear, the following commands do the following:

function func () {
  nettop -L 1 -c -P -x | awK -F "\"*,\"*" '{sum += $6} END {print sum}';
};
  • nettop -L 1 -c -P -x: Retrieves the bytes_out and bytes_in from all the software running on your computer.
  • awK -F "\"*,\"*" '{sum += $6} END {print sum}';: Sums the rows of either the bytes_in or bytes_out. Notice how above we have $6, and that designates the 6th row of the output of the nettop command, which is bytes_out.
export first=$(func);
sleep 1;
export second=$(func);

From there, we are exporting the value of the bytes_out, waiting one second, and grabbing the second value of bytes_out, where we then use the subtraction of each to run it through the bth function:

bth $(expr $second - $first)

So long story short, you are looking to modify the bth function to output only 1 value. The easiest way is to utilize the Wikipedia article I linked above (in this reply) and figure out the conversion of bytes to whatever unit you would like. Then simply divide the subtraction of $second - $first by that unit to receive its proper output. So to convert bytes to megabytes, you would divide the value by 1e-6. However, do keep in mind that this is not your network speed, and merely the usage of your bytes_in and bytes_out, or in other words, your network "throughput."

I do want to mention that the step in which $second-$first is performed, there does seem to be some negative values that occur. I am honestly uncertain as to why this is happening, but it is a side-effect. I would hope a more experienced developer in bash could chime into the conversation regarding this.

I haven't had a lot of time to work on my touchbar preset to post here, but perhaps you could grab some ideas from my implementation. I created a Github repo and uploaded some .sh files that allow the installation of external tools with ease. This is how my current preset looks when the user first opens it:

When the user clicks the button, the following scripts are activated:

/usr/bin/git clone https://github.com/synchronizing/Simple ~/.simple
tell application "Terminal"
	do script "~/.simple/src/install_dependencies.sh && exit"
end tell

Which prompts the user with the following:

17%20PM

This is the best way I could come up with to install dependencies. The code for the bash files can be found at the link here, under /src/. The code for the above is rather quite simple:

# ASCII logo print-out.
function simple () {
  echo -e "β–ˆβ–ˆβ–ˆβ–ˆβ–ˆβ–ˆβ–ˆβ•—β–ˆβ–ˆβ•—β–ˆβ–ˆβ–ˆβ•—   β–ˆβ–ˆβ–ˆβ•—β–ˆβ–ˆβ–ˆβ–ˆβ–ˆβ–ˆβ•— β–ˆβ–ˆβ•—     β–ˆβ–ˆβ–ˆβ–ˆβ–ˆβ–ˆβ–ˆβ•—"
  echo -e "β–ˆβ–ˆβ•”β•β•β•β•β•β–ˆβ–ˆβ•‘β–ˆβ–ˆβ–ˆβ–ˆβ•— β–ˆβ–ˆβ–ˆβ–ˆβ•‘β–ˆβ–ˆβ•”β•β•β–ˆβ–ˆβ•—β–ˆβ–ˆβ•‘     β–ˆβ–ˆβ•”β•β•β•β•β•"
  echo -e "β–ˆβ–ˆβ–ˆβ–ˆβ–ˆβ–ˆβ–ˆβ•—β–ˆβ–ˆβ•‘β–ˆβ–ˆβ•”β–ˆβ–ˆβ–ˆβ–ˆβ•”β–ˆβ–ˆβ•‘β–ˆβ–ˆβ–ˆβ–ˆβ–ˆβ–ˆβ•”β•β–ˆβ–ˆβ•‘     β–ˆβ–ˆβ–ˆβ–ˆβ–ˆβ•—"
  echo -e "β•šβ•β•β•β•β–ˆβ–ˆβ•‘β–ˆβ–ˆβ•‘β–ˆβ–ˆβ•‘β•šβ–ˆβ–ˆβ•”β•β–ˆβ–ˆβ•‘β–ˆβ–ˆβ•”β•β•β•β• β–ˆβ–ˆβ•‘     β–ˆβ–ˆβ•”β•β•β•"
  echo -e "β–ˆβ–ˆβ–ˆβ–ˆβ–ˆβ–ˆβ–ˆβ•‘β–ˆβ–ˆβ•‘β–ˆβ–ˆβ•‘ β•šβ•β• β–ˆβ–ˆβ•‘β–ˆβ–ˆβ•‘     β–ˆβ–ˆβ–ˆβ–ˆβ–ˆβ–ˆβ–ˆβ•—β–ˆβ–ˆβ–ˆβ–ˆβ–ˆβ–ˆβ–ˆβ•—"
  echo -e "β•šβ•β•β•β•β•β•β•β•šβ•β•β•šβ•β•     β•šβ•β•β•šβ•β•     β•šβ•β•β•β•β•β•β•β•šβ•β•β•β•β•β•β•\n"
}

clear
simple

# Checks to see if Simple's dependencies are already installed.
~/.simple/src/verify_dependencies.sh
if [[ $? == 0 ]] ; then
  echo -e "All dependencies are already installed!"
  read -p "Press any key to exit."
  exit 0
fi

# If dependencies are not installed, runs user through installation.
echo -e "This is the depedency installation for Simple. This script will be downloading"
echo -e "and installing the following:\n"

echo -e "  1. iStats: OSX system monitoring tool."
echo -e "  2. Brew: OSX missing package manager."
echo -e "  3. Python3: The latest version of Python."
echo -e "  4. Tocco: A python 3 utility tool for complete OSX system information.\n"

echo -e "The above depedencies are needed for Simple to run effectively. If you are a"
echo -e "developer I welcome you to contribute & verify Simple's security and integrity."
echo -e "You can find more information here: https://github.com/synchronizing/Simple\n"

read -p "Ready to proceed instalation? [y/n] " -n 1 -r
echo -e "\n"
if [[ ! $REPLY =~ ^[Yy]$ ]]
then
  echo -e "Simple requires depedencies to be installed to work properly. Feel free"
  echo -e "to come back if you change your mind. This script can be found here:"
  echo -e "http://github.com/synchronizing/Simple/blob/master/src/install_depedencies.sh"
  echo
  exit 1
fi

which /usr/local/bin/iStats > /dev/null
if [[ $? != 0 ]] ; then
  echo -e "Installing iStats.\n"
  echo -e "> sudo gem install iStats"
  sudo gem install iStats
else
  echo -e "iStats is already installed. Skipping this installation."
fi

echo -e "----------------------------------------------------------------------"

which /usr/local/bin/brew > /dev/null
if [[ $? != 0 ]] ; then
  echo -e "Installing Brew."
  echo -e "> /usr/bin/ruby -e \"$(curl -fsSL https://raw.githubusercontent.com/Homebrew/install/master/install)\""
  /usr/bin/ruby -e "$(curl -fsSL https://raw.githubusercontent.com/Homebrew/install/master/install)"
else
  echo -e "Brew is already installed. Skipping this installation."
fi

echo -e "----------------------------------------------------------------------"

which /usr/local/bin/brew > /dev/null
if [[ $? != 0 ]] ; then
  echo -e "Installing Python3."
  echo -e "> brew install python3"
  brew install python3
else
  echo -e "Python3 is already installed. Skipping this installation."
fi

echo -e "----------------------------------------------------------------------"

/usr/local/bin/python3 -m pip freeze | grep Tocco > /dev/null
if [[ $? != 0 ]] ; then
  echo -e "Installing Tocco."
  echo -e "> /usr/local/bin/python3 -m pip install git+http://github.com/synchronizing/Tocco"
  /usr/local/bin/python3 -m pip install git+http://github.com/synchronizing/Tocco
else
  echo -e "Tocco is already installed. Skipping this installation."
fi

echo -e "----------------------------------------------------------------------"

clear
simple
echo -e "Installation completed! You may go back to BetterTouchTool and continue.\n"

# Exits with success.
read -p "Press any key to exit."
exit 0
1 Like

Is there a way to get the disk space available to match the amount displayed in the Finder? e.g. right now the df -h command gives me 40Gi available, but in Finder the same drive says 52GB available. Converting 40 gibibytes to gigabytes gives around 42GB, so it's not as simple as that I don't think.
Thanks,
T

Unfortunately I don’t think there is a reliable way to get accurate information about how much disk space you have left.

Basically macOS now frequently has a habit of telling you that you have more diskspace than you do, because it expects that it can β€˜purge’ some space (especially APFS/Time Machine Snapshots) if things get low.

Plus macOS also splits the drive into two APFS volumes, and so you have to make sure you get the sizes from both of these and… long story short I’ve basically given up trying to figure out how much space I have as long as I’m not getting super-low on disk space.