Starting today I'll trying to post one or two cool thing you can do with BetterTouchTool per week.
Let's start with something that is being talked about a lot lately: OpenAI's ChatGPT. Many people already use it for their daily work. I'll show you how to use BTT to integrate it seamlessly into your macOS experience.
This post will show two things:
Show ChatGPT via a menu bar icon
Use ChatGPT inline in every textfield in macOS. (Via OpenAI's paid APIs, so without hitting the constant capacity issues)
Thanks, this is much appreciated. I have a question: is there a way to display the result of the transformation (in an HUD or alternatively in a notification) instead of replacing text or copying to the clipboard?
Thanks for this very practical tip, I need to follow this blog daily.
I have opened an account with OpenAI and I have 18 USD token for the API. The cost of the tokens are hard to predict, it's supposed to be about 1000 tokens for 750 words.
The thing is that here in Spain the use of ChatGPT via web is 20 USD/month, to use "speed preferences". We will use this option with BTT to see which is more profitable, but it is surely more agile with BTT.
I understand that ChatGPT via web, in each chat that opens, learns about the topic you are talking about. So it will always answer you according to previous answers, and even teach you certain words for that context. As far as I can see, here you always work on the same chat "window", right?
I would like to know your opinion, best regards and thanks for your input.
For my usage, the API is much cheaper than the $20 option, I think that will be the case for most people.
If you want the "chat style", with the API, you just need to select the previous answer when adding new input (see Text completion - OpenAI API) . This is not 100% the same as ChatGPT, but works pretty well for me.
The API might even produce better results, because as far as I know the davinci API is the best model they have available.
In the near future they will also release a ChatGPT API, but that is not yet available.
Thank you very much for your reply. I understand now the difference between OpenAI API and ChatGPT.
I think that I can use your integration for occasional help, and for ChatGPT context development.
As I see your code, could I change the model? Or would it be necessary to change some other line? This is just for information, you are very right when you say that the most complete model is the DaVinci one.
Indeed, that seems to be a bug in ChatGPT if the sidebar is not visible. Maybe we can inject some Java Script to track the enter key, I'll have a look later
Great post! Thank you for the excellent work.
I have a question regarding connecting to ChatGPT due to region limitations. To address this, I have set up a dedicated local proxy (http://127.0.0.1:xxxx/) for this purpose, but I am having trouble configuring the "Floating WebView/HTML Menu" in BTT to use this proxy. Is there a way to configure BTT to use this proxy in the "Floating WebView/HTML Menu"? Thank you!
PS:For some reason, I can't use "global mode" through this proxy, currently only Chrome and vscode are using this proxy.
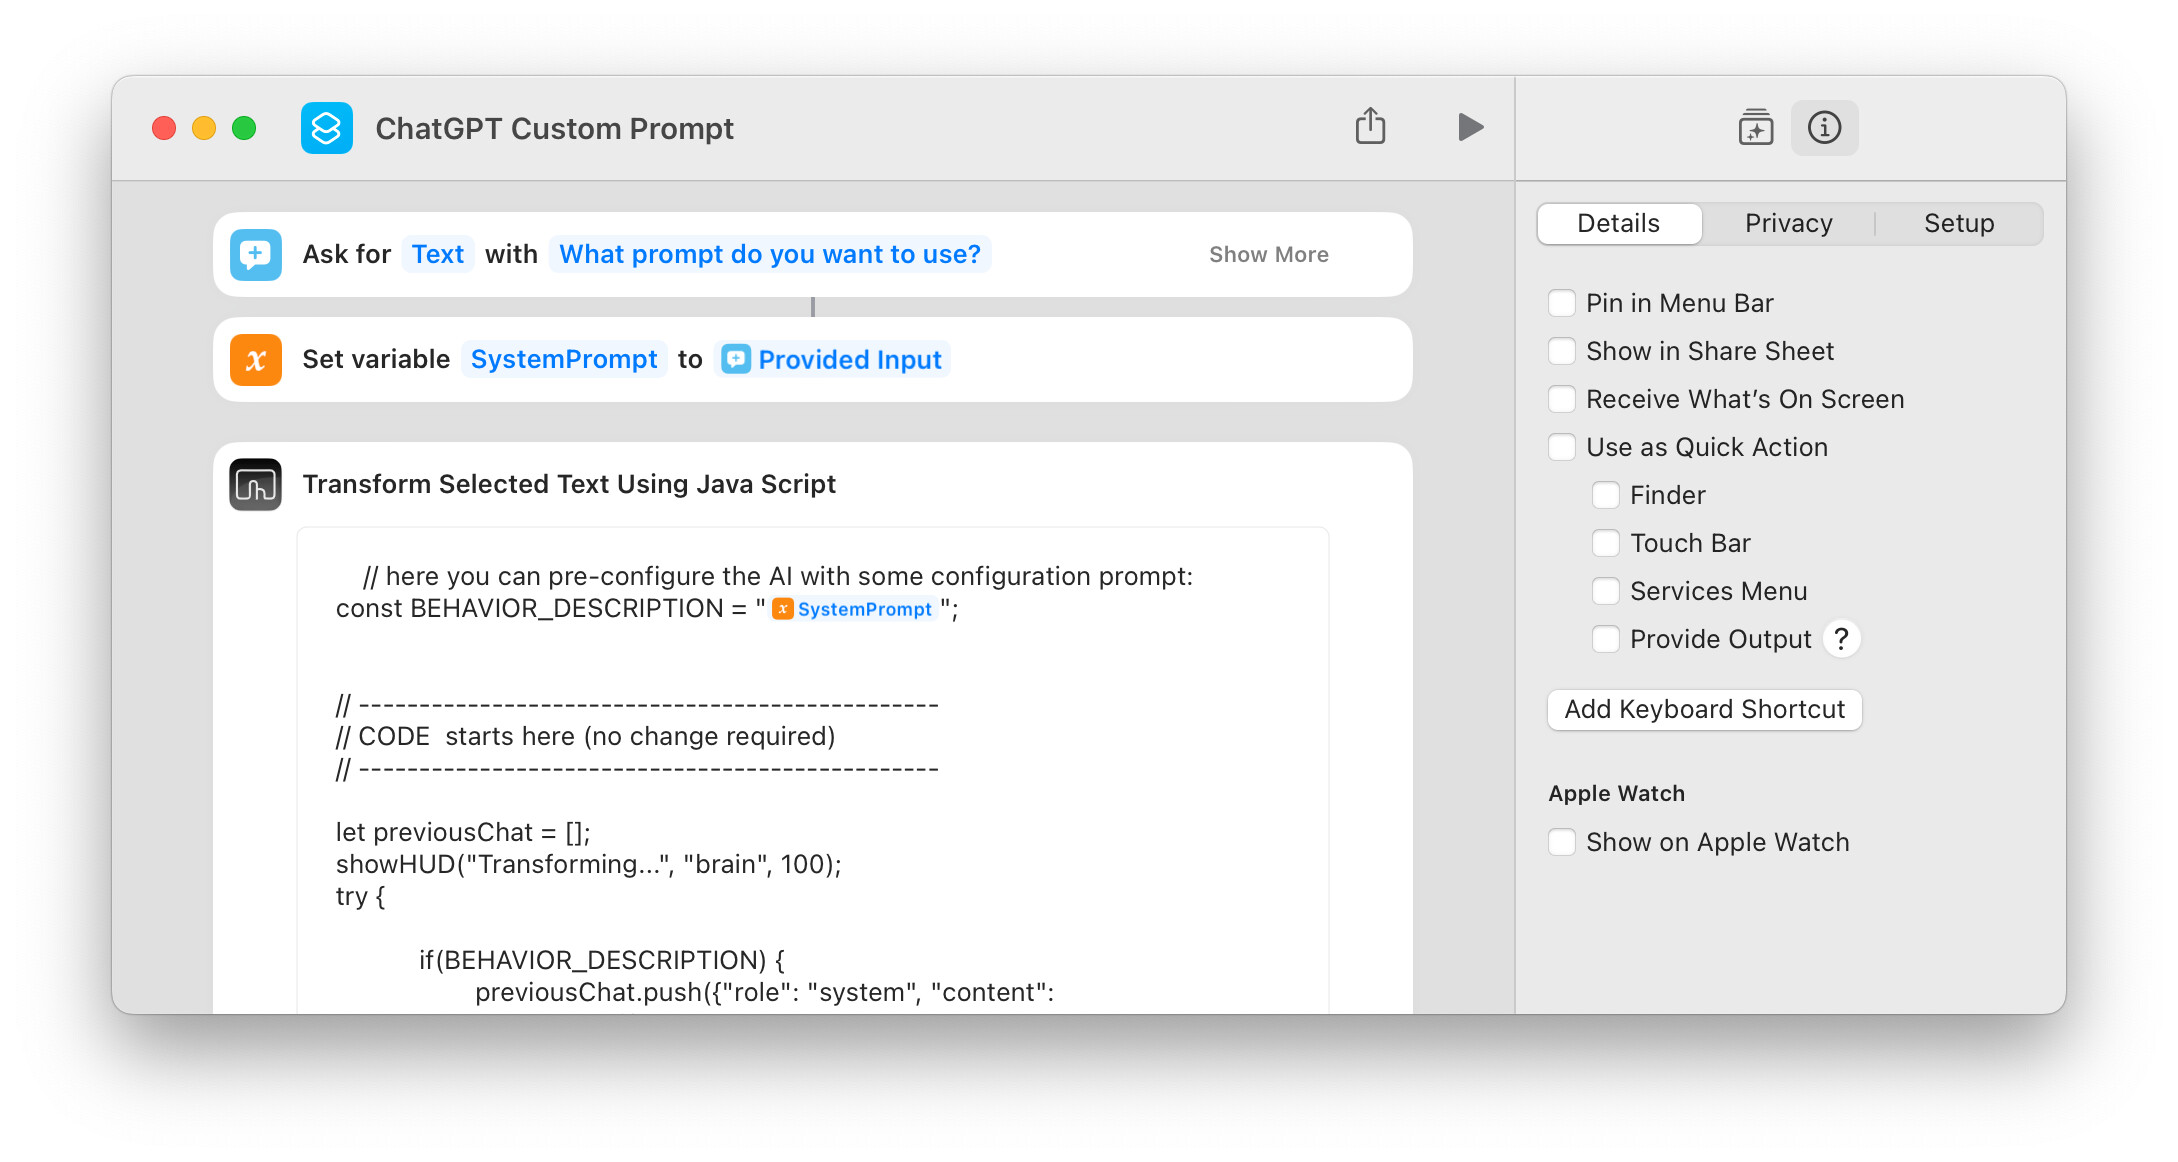
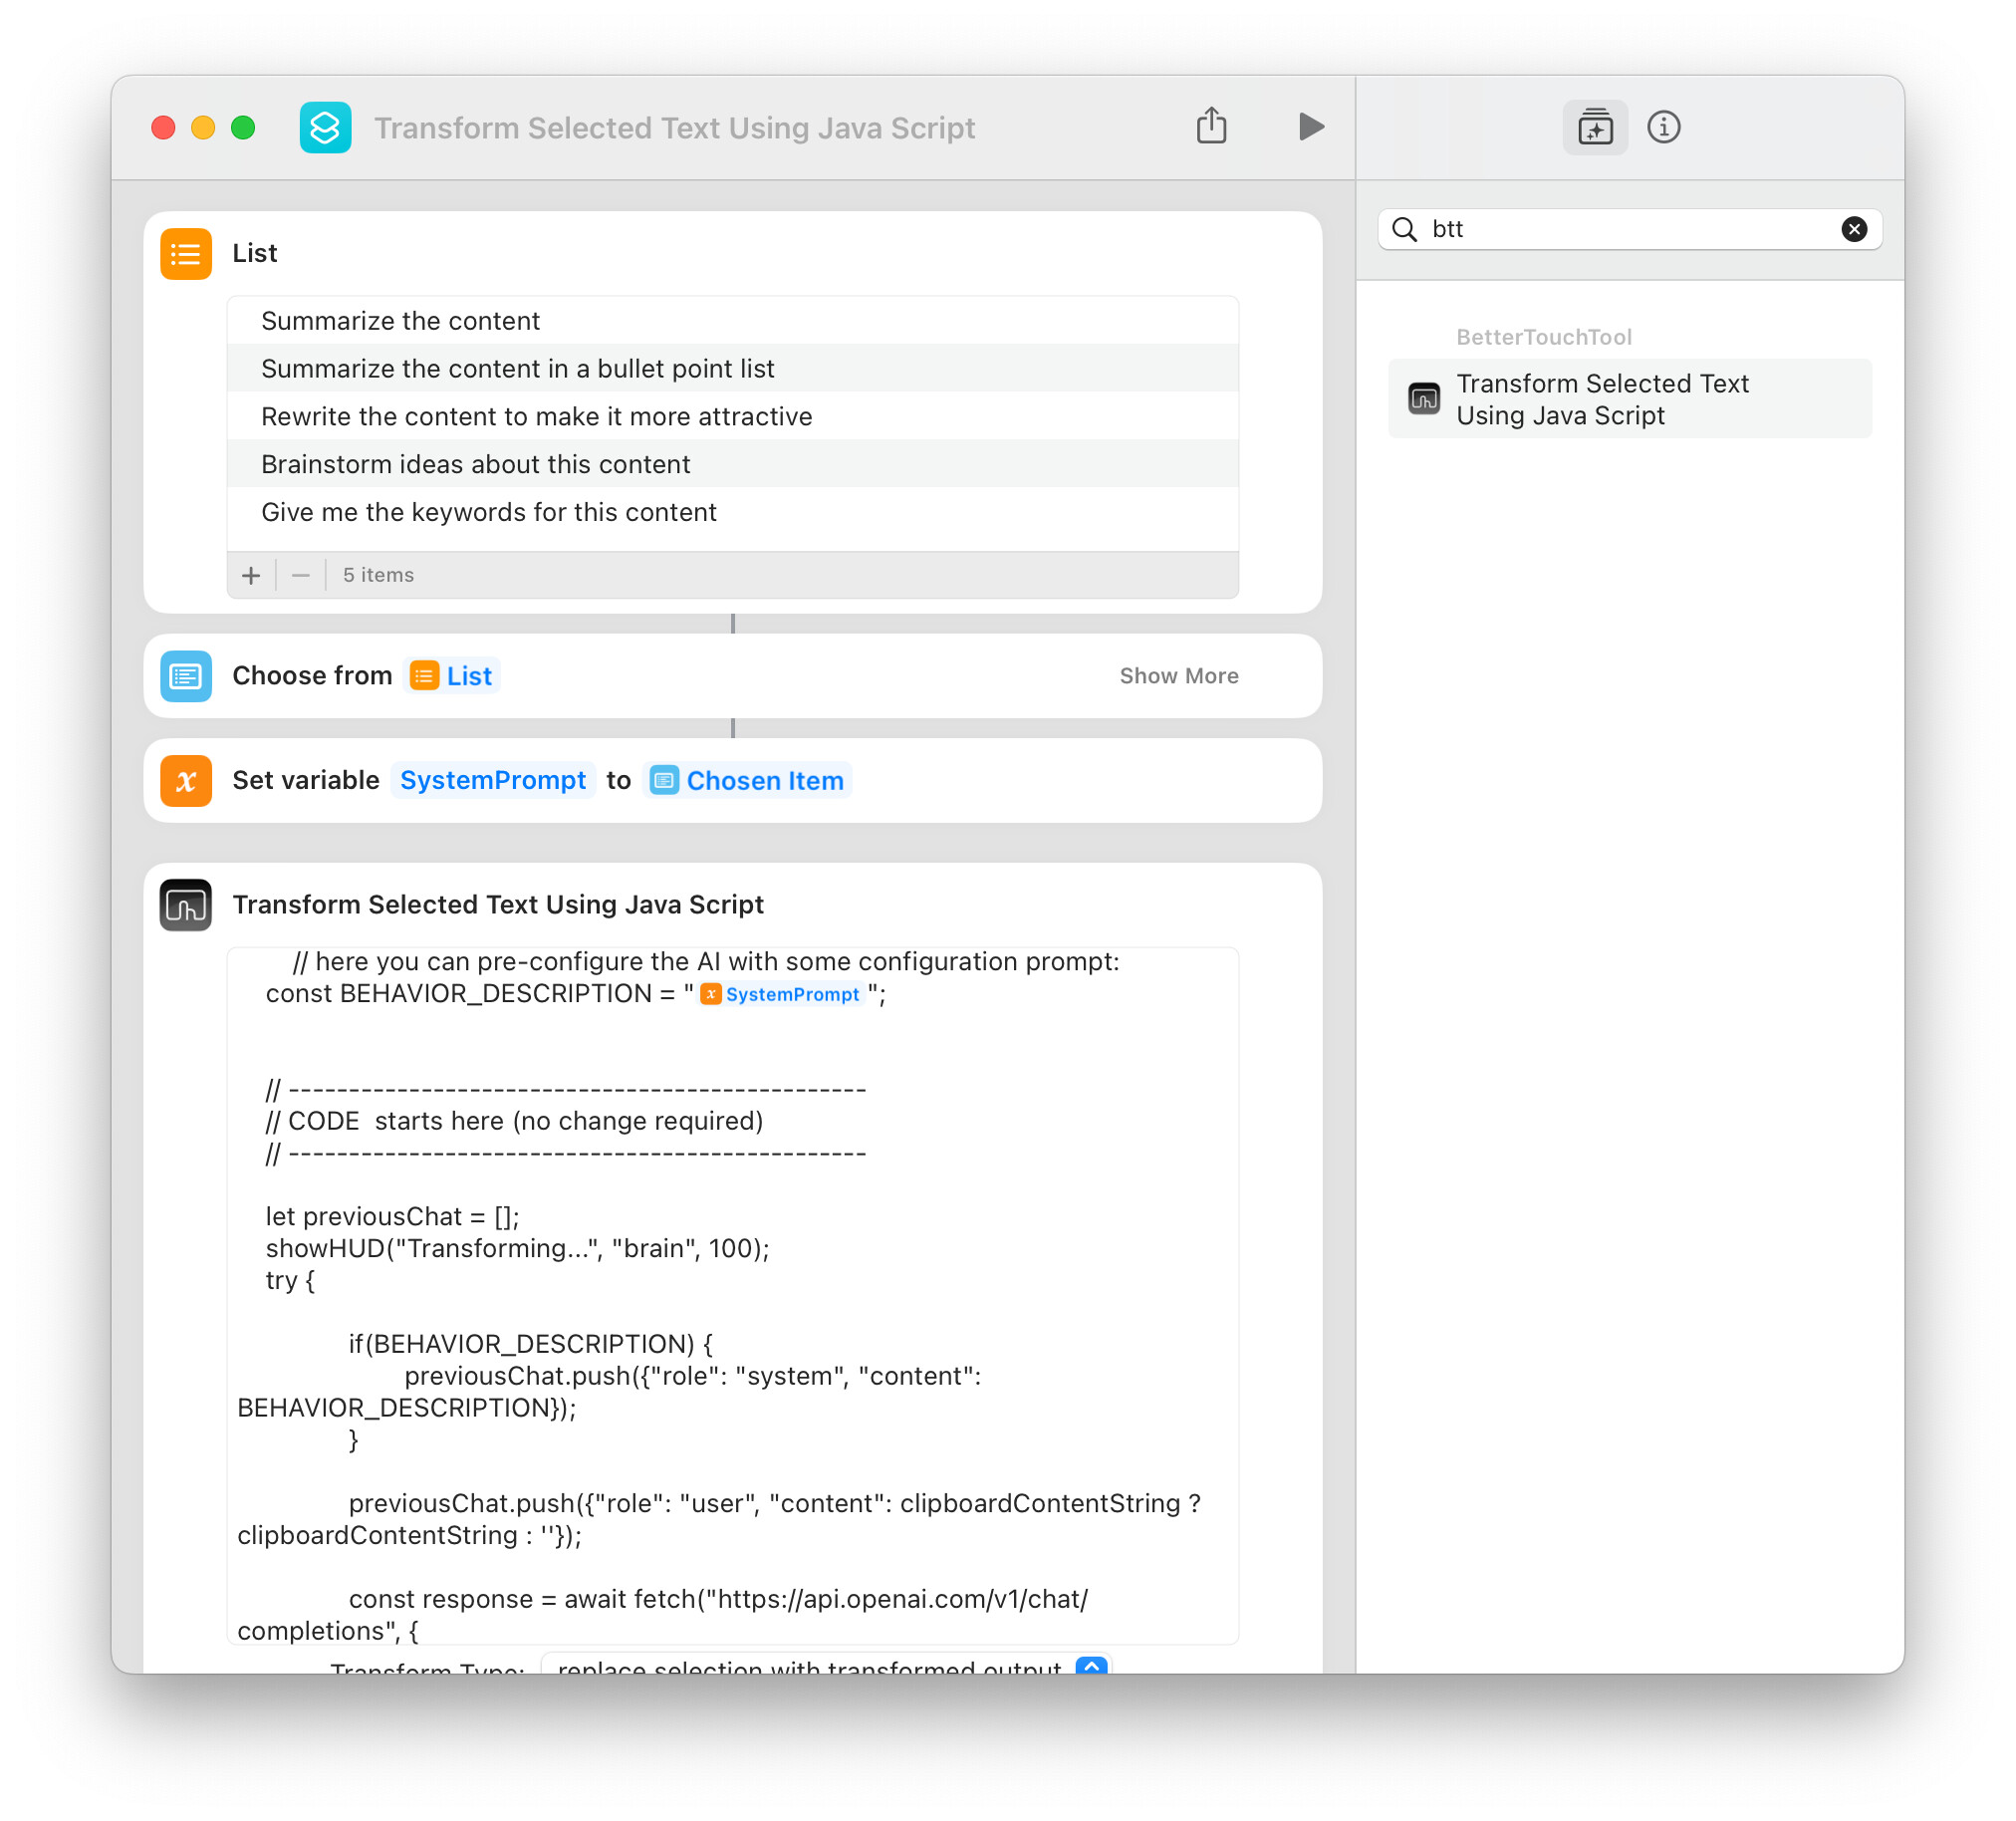
@crispaper, here is a script that uses the new (and 10x cheaper) ChatGPT API:
For now it will only send selected text. I think it can be easily updated to also keep history, making the "chat" thing work. I'll have a look tomorrow.
For this to work, each custom menu item can just trigger the Named Trigger: TransformWithGPT_ContextMenu, but the script would need to be adjusted to take in the name of the context menu item that was clicked. Q: I'm not sure what this variable in BTT is called, but is there any way to get the context menu item name that was clicked?
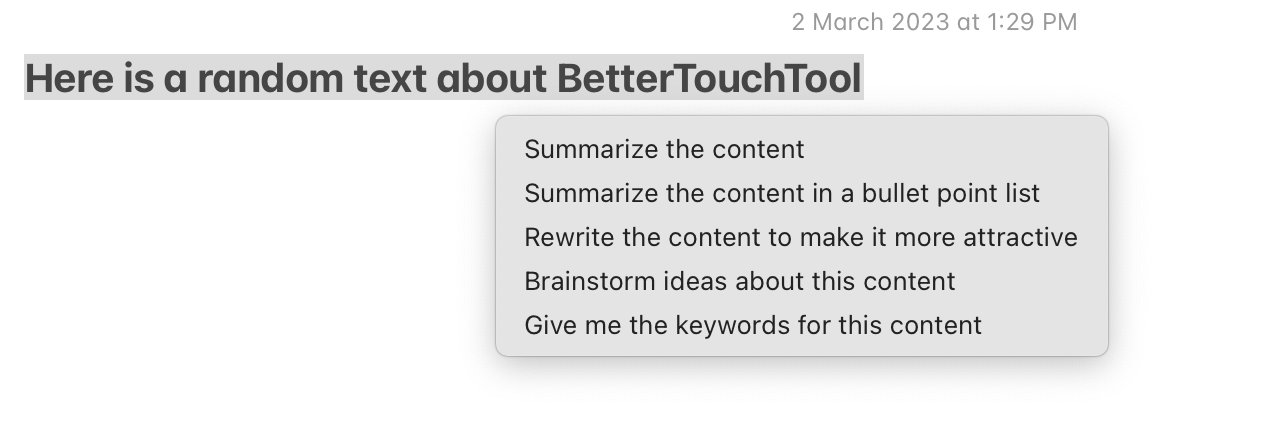
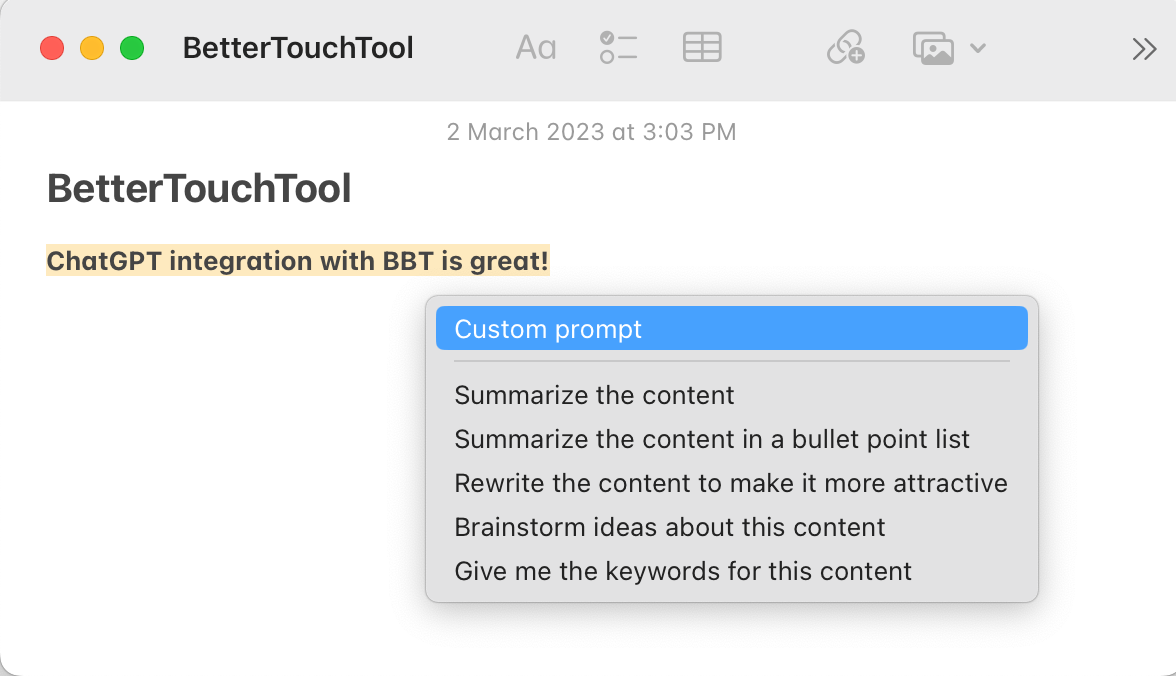
Idea 2: Make a text selection, open an input field to type in a customer system prompt that should be used
Idea 3: Extend the context menu with a start / end conversation option
If we add a start and end conversation option to the context menu, one could use this to provide previous messages to the OpenAI API without having to always select the entire text and stay within one macOS app.
Here is a possible flow:
Select text and click on start conversation
Receive answer from the API & add this to a global variable that stores the list of previous chats (both user and system content)
Select another text and trigger GPT => this will then pull in the global previousChat variable so the request has the additional context
Click on end conversation to clear previousChat
I know this is already possible with the script above, but one would always have to select the entire text and answers. This way would allow you to select a text in e.g., Outlook, then switch over to Slack, etc.
There are many other awesome use cases @Andreas_Hegenbergis there any way to programmatically get the name of the context menu item that was clicked in BTT's JavaScript environment?